Tuesday, December 13, 2011

Fabrics Came in the Mail

Enabled by Carolyn, I placed an order with FabricMart. I have been hesitant to purchase from the US, as shipping can cost a fortune, sometimes not making it worth the expense. But FabricMart only charges what the post office charges, no extra, so that seemed reasonable to me. And I know that shipping charges can be steep, as I became painfully aware during the last year of my business when they were becoming my greatest expense.

So what did I get?

This is a stretch cotton woven plaid in purple and black. I have been looking for a black and white plaid that would work for a shirtdress, but you have to compromise when it comes to fabrics. The fabric in your mind's eye will probably not be out there; I remember Pati Palmer saying once that you should shop for fabric first, pattern second. This is because, for most sewers, a fabric will tell you what it should be. Sound crazy? not at all, just walk around a fabric store and see what the fabrics are saying. They talk to me all the time! Not that they say the same thing to everyone, that is the beauty of sewing; the same fabric can become many different things.

This second fabric is a bamboo knit in a gorgeous sky blue. I have been reading about bamboo and wanted to see what it was like. There is no way bamboo fabric is ever going to be here in my Fabricville; no sense waiting. This fabric is heavy and drapey and, if it weren't for the label, I would have guessed that it was a rayon knit. I have 2 yards, enough to make either one of these tops. By the way, Sandra Betzina has a new knit top in Vogue that is gorgeous, with a center panel that is gathered. I saw a top like this on my aquacise instructor and was smitten by it. The nice thing about this pattern is that it includes all sizes, so if I decide to make this for my daughter, I will have her size there too.

The last fabric I bought simply to make the parcel worth shipping. And it is the best of all. A 100% cotton shirting that feels so light and silky, it will be a delight to sew and wear.

Now to finish up the robe and put that aside with the nightie, ready for the hospital stay. I am still knitting the blue sweater, finished the back and am doing one side now. And as always, cruising the internet for the next project.

I discovered some wonderful blogs and you might like them too.
Lilacs and Lace

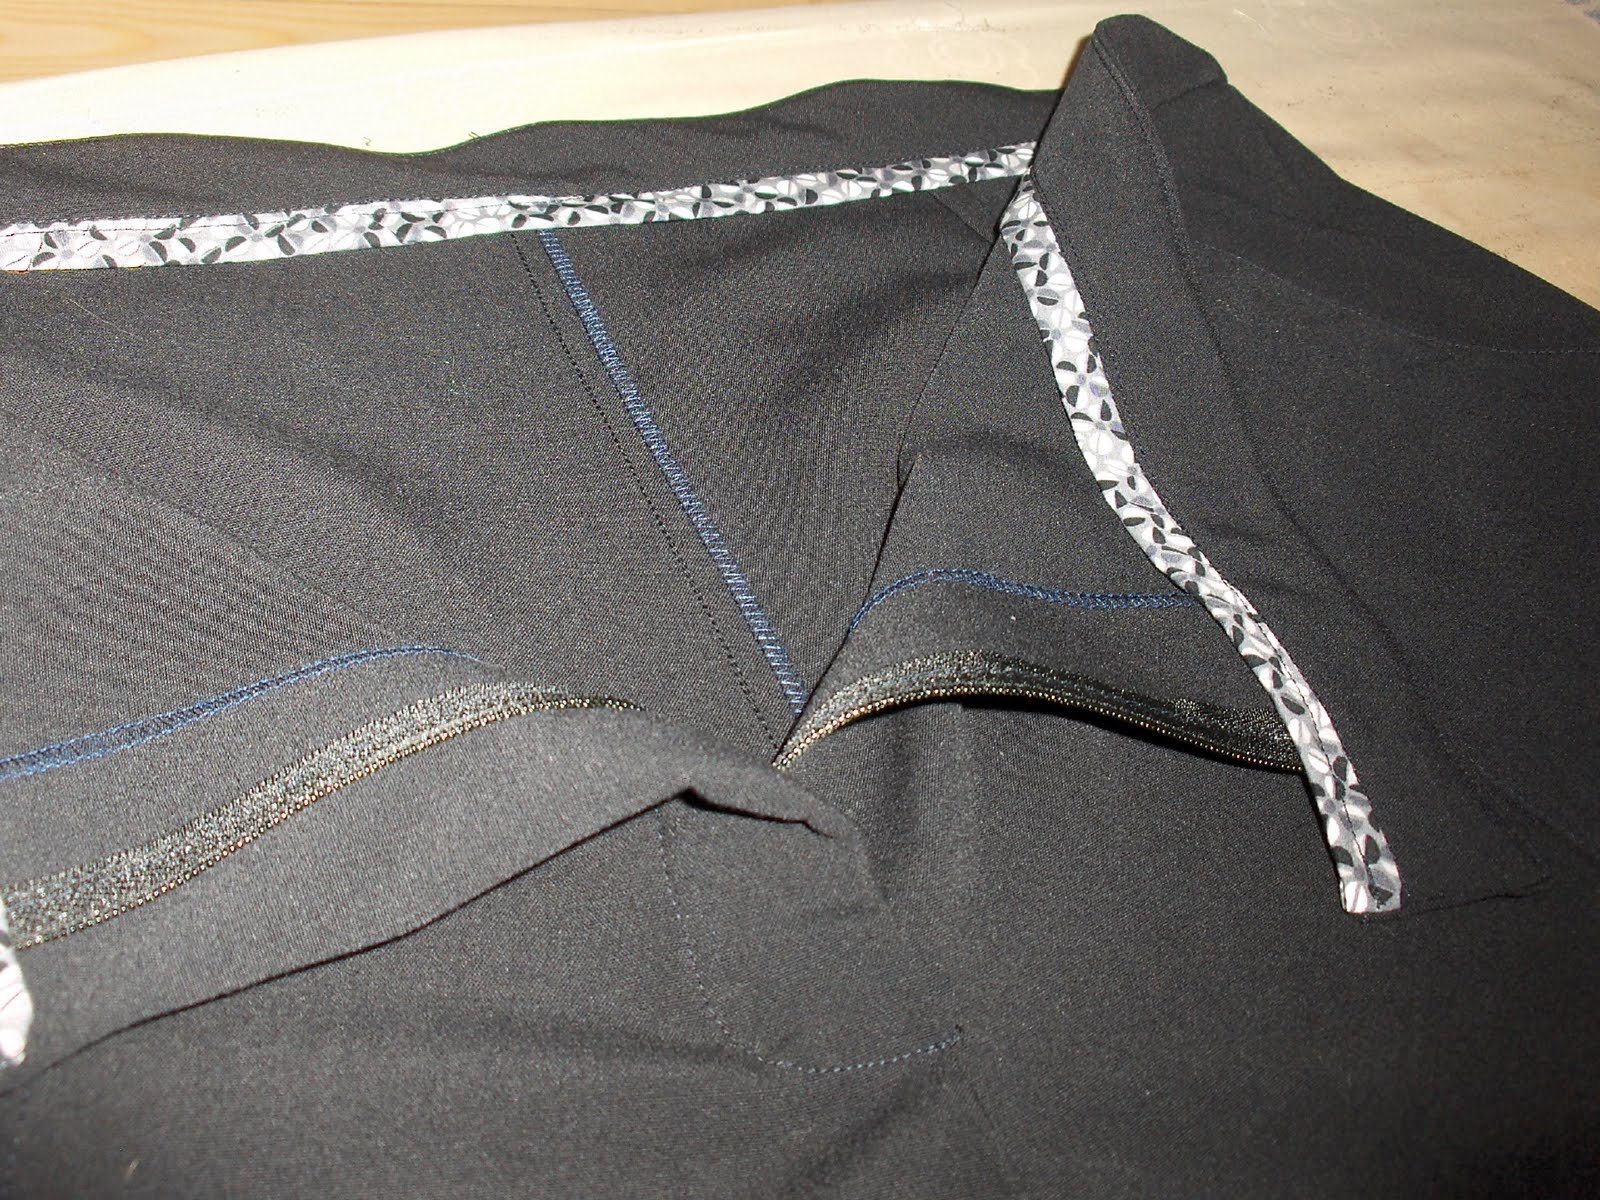
I discovered this blog from another, as we so often do. One blog led to another and this one popped up. Laura just won a Threads competition and her prize is a new Bernina sewing machine, which I am sure she will put to good use. Take a cruise down her blog, page 2 especially where she shows that she binds all her seams with rayon binding that she dyes. This is essentially Hong Kong finish and it is lovely to see, especially since the binding matches the fabric. This blog has kindled an interest in vintage patterns and can you ever get immersed in that subject!

The second blog that has captured my interest is
Wry Punster
This is a blog of an incredible hand-knitter. I can't find the post right now, but she has a sweater that is full of beads. Now I can't stop thinking about the possibility of knitting a sweater with beads on the yoke. So many ideas, and not enough time, right?

Oops, sorry, the beaded sweater is here on Laura's blog, this woman can not only sew, she can knit beautifully. And I can see these knits teaming up with vintage skirts and dresses so well.

Beaded Sweater

Wednesday, December 7, 2011

Sewing for Bedtime

I remember one of my daughters remarking that she knew I would be sewing something new to wear because I had an event to go to. She is absolutely right; everytime something comes up in my life, my first thought is what will I make to wear to it? I don't know why this is so, unless it says that my wardrobe is so pathetically lacking in a variety of outfits, that I feel compelled to make something appropriate.

And this doesn't even stop with daytime wear. Since I am on a list to be called for hip replacement surgery, I thought "what will I wear in hospital?" And then an old sewing friend of mine said "you better have a new nightgown and a robe that covers you up". She then went on to explain that the robe should be long, but shorter in front than in the back so that I wouldn't have any trip-ups. She said long, because she thinks that nothing looks quite so bad as bare legs shuffling along a hospital corridor.

So, now the kids' jammies are done, wrapped and ready to be posted, I must get this nightgown sewn up and whip up a robe to wear with it. My friend is right, I don't want to be caught in hospital reduced to their gowns or having to wear my own old tired nighties.

I just found out the hospital stay will most likely be three days, which probably means I need two nightgowns! Better get cracking, as I might get a call if there is a cancellation. One woman in the pre-op class was called last Friday and she is having surgery this coming Friday. And she had been expecting to wait a year for her surgery. While the expectation of surgery and recovery is not something I am looking forward to, I will be very happy to have this over with. I feel as if my life has been on hold for the past year, given the mobility issues of a bad hip. I understand now what people mean when they say they got their life back after joint surgery. Looking forward to it!

Thursday, December 1, 2011

Who Knew?

I have had a revelation. Perhaps I have been in knitting limbo but I had no idea about blocking knit garments. When I finished my last sweater, I asked the question if anyone knew how to steam a sweater once it was completed.

Ann suggested that I ask Ann Rowley at Stitcher's Guild so I did. Ann asked what the fibre content was, and if it was wool, it could be steamed into shape. She suggested "wet-blocking" which would entail completely soaking the sweater in warm water in the tub, then lifting it out and pinning it into the dimensions desired and leave it to dry. And I thought I could just press this sweater! Hah!

A google search on blocking sweaters has been eye-opening. Even though I grew up with a mother who was constantly knitting, I don't ever remember her blocking anything. I don't think she did. I know that she pressed the pieces before sewing them together, but she didn't pin anything into a shape.

What I found here in this article, To Block or Not to Block is fascinating. So I thought I would pass it along to anyone else who knits or crochets. The advice is so valuable. I had absolutely no idea that you could mold the shape of your garment by wet-blocking. You can build in shape where required, such as a little bust shaping, and you can lengthen sleeves if they are too short. All of this depends upon your fibre content, I am sure, with wool being the most cooperative.

What a surprise! How could I have been around knitting and crochet for so many years and not know this? But I don't recall any patterns that concluded with instructions to block the garment before sewing it up. It must be assumed that we all know this.

Perhaps all you knitters know this already. And I am just late to the game. Or maybe I have just been blissfully ignorant of this technique. But, if it is of any use to you, I am happy to pass the information along.

Monday, November 28, 2011

Word of Advice

Don't knit a patterned item when you are getting tired!

Ask me how I know - I think I have ripped out my new sweater at least five or six times. How could I not see that the pattern was shifting over a stitch half way up? I was beginning to wonder why I kept getting this wrong when it finally dawned on me. Each row begins with either knit 5 or purl 5 stitches, then it becomes either knit 4 or purl 4 for the rest of the row. If you are watching tv while doing this, it becomes very easy to knit 5 at some point across the row rather than 4 and then the whole pattern becomes skewed.


Grrrr ..... and I said I wasn't a perfectionist - guess I was wrong.

Saturday, November 26, 2011

Black Pants - Starting a Plan?

There is no doubt about it, once you SWAP, you tend to think in terms of wardrobe combinations. Not that I am planning on making 11 pieces that will all coordinate, but one garment completed does get you thinking about what to wear with it. Items are no longer made in isolation.

These pants are made with my now-favourite pant pattern, Plenty of Pockets from Saf-T-Pockets patterns.


I like this pattern for a number of reasons: first, they fit me well; second, they have a contour waistband which is so comfortable (unlike straight waistbands that don't sit at my natural waistline); and third, the waistband is finished off with binding. I always appreciate this last feature when I put these pants on; they actually look nice inside!

The first time I ever made a contour waistband was about 15 years ago, in a jean skirt pattern by Palmer/Pletsch. A contour band is curved to sit just below your waist, so that it rests on your high hipline. Therefore it is curved and narrower at the top, thereby requiring a facing. The extra fabric and double interfacing gives the band stability and it doesn't roll, as traditional waistbands tend to.

If the serger thread appears blue to you, that's because it is. Don't thread your serger at night, when navy thread looks black.
The binding on the waistband facing is a cotton print, that was a favourite dress last year. The good news is that the dress is now too large and will be donated.

I have made this pant pattern up at least six times now - in cotton, wool, and this version in rayon/poly/lycra that has good drape. And I was pleased to trim 1/4" off all side seams this time around. Having finished these pants, I might sew up some red boiled wool into a quick jacket.

But first, plaid flannel pyjama bottoms for the grandkids for Christmas.

Wednesday, November 16, 2011

Next Project

I couldn't wait to finish the last sweater because I had this one lined up. A short sleeve little sweater just right to wear over soft dresses. Now to find a rayon batik similar to the one in the photo. I can see the style of dress, but the fabric might be harder to find. Guess I didn't stash enough from when I had the fabric business!

I knitted and unraveled this about five times before I got the hang of the pattern. I guess I can't watch a movie and count at the same time. There are a couple of mistakes but this is the back and the mistakes are near the ends, so they won't be visible. And I never considered myself a perfectionist. (Correction, I must be a perfectionist, because I just ripped it out again to start over, as the mistakes were bothering me.)

The yarn is a very soft soya cotton called Sublime. I wanted to knit with a finer yarn than my previous two sweaters, so asked Louise at LK Yarns for what I should pick. She took me to the middle row of her store and said this weight and began to advise me on what to pick. But my hand reached out and touched this yarn and the decision was made immediately.
LK Yarns is a delightful shop in the Hydrostone area of Halifax. Louise began years ago with a small area within Sears. Everyone thought she was selling Sears yarns and they were surprised by the price and selection. Not your usual acrylic wash and wear stuff. She stayed there for years, then moved into a renovated store in a small strip of shops in north end Halifax. The shop has high ceilings with the heating ducts visible, old wooden floors and everything speaks antique and cozy. I love the shop and now that my knitting has resurfaced, I will be in there more often.

I knit slow, but I do so enjoy it these days. Something about sitting in the evening with my husband. Last night, we had a fight discussion of something I had read on a blog. I dislike arguing, but Nick calls it discussion and he loves it. Somehow I have to find the balance in there.

Saturday, November 12, 2011

Knitting, Not Sewing


I haven't posted here in ages, for two reasons. One, no sewing going on, due to illness and my "mojo" has vanished. Second, I have developed a fondness for knitting.

First it was the flu, then came viral bronchitis, which is still plaguing me. This saps all energy; this morning after raking leaves, I was done in and had to take a nap. And I am not someone who takes naps.

Hopefully this bug will be gone soon, although the doctor said her patients are complaining of 6-8 weeks to get rid of this thing. Much coughing is done, particularly at night, which means broken sleep. But enough of complaining.

I finished the sweater above and the pattern calls for knitted buttons. I made them but don't like them, so will look for some pretty ball buttons at the store next time I go. It is a very easy pattern, done in garter stitch and knitted on circular needles. I have decided that I won't knit on circular needles again, it is too heavy and bulky to be enjoyable. I much prefer smaller pieces on straight needles. And what's the difficulty with sewing up a side seam anyway?

If anyone has advice on blocking sweaters, please let me know. I am hesitant to do this but I know it needs it. I just don't know how much steam I should use and how much I should press the sweater. The yarn is a wool/acrylic blend - mostly wool. And I guess I can call this jacket #7.

The pattern is from Cascade Yarns, I think I wrote about it in a previous post. If you are making this pattern, be aware that it calls for way too much yarn. I have two full skeins left over and, since I bought it in Maine, I can't return it. Perhaps I will be knitting some scarves or hats in the near future.

I do have some sewing plans afoot. I cut out a pair of pants in black RPL a few days ago, but haven't got around to doing anything except putting them on the sewing table. I hope to get in there sometime this week, energy permitting. Till later.

Saturday, September 24, 2011

Rachel Skirt Complete

Everything that could go wrong did go wrong when I made this skirt.

First, I had trouble figuring out the pockets. Then I sewed the back side seams together and put the zipper in there, with contrast edgestitching and topstitching before I realised my mistake.

Then, when I finally put the zipper in the right seam, I cut off the top of the zipper and lost the tab, had to rip all the stitching out and insert a new zipper!

I was beginning to think that I had lost my ability to sew altogether. But the positive side of this project was that I had to take in the side seams at the waist and put darts in both front and back to make it fit. I had originally taken the darts out and added to the waist side seam, but it was not required after all. That was a pleasant surprise.

As other people have found out, this skirt is very short. I had added 6" to the length and this ends up at the knee for me. Double-stitched hem completed the skirt this afternoon.

This is a nice pattern, I will definitely make it again. I think a lining would be a very good idea, because the pocket bags feel weird against the front of your thighs. One is used to pockets being in side seams or being stitched down, not hanging loose on top of one's legs. A lining would eliminate that feature.

Sunday, September 18, 2011

Vogue 1247 in denim

Working on Vogue 1247, the "Rachel skirt" as it is called. I decided to eliminate the waist darts on both front and back since I don't have any waist shaping - why use darts? this alters the waist of the pattern to fit me better and means I don't have to add so much at the side seams.

I also quit the idea of binding all the raw edges in favour of simple serging, as I plan on top-stitching most seams to make this look more like a denim skirt.

This is the front of the skirt. I stopped and started the top-stitching at the pockets and tied in the thread tails by hand. No back-stitching with this.


m
And the skirt back is stitched together, top-stitched and is ready for zipper-insertion. The pattern calls for an invisible zipper, which are hard to find in the right lengths and colours in this town, plus I prefer a regular zipper as I plan on top-stitching that as well.

I found the pocket instructions very confusing. I think they are missing a diagram there, the one that shows what to do with the pockets after they tell you to understitch them. There should be a diagram showing the pockets pressed up away from the skirt bottom and then you would see where you are supposed to stitch yoke to bottom, without catching the pockets in that seam. I felt like a real dolt trying to figure this out and finally just laid it out as it would be finished, in order to see what steps to take to get there. It is critical to stitch that seam well, or you might end up with lots of bulk at the pocket edges.

Update: I remember reading somewhere not to assume that, just because you made a mistake once, you won't do it again. I laughed then but I didn't laugh today. I can't believe that I inserted the zipper completely wrong. Rather than putting the center back seams together, I sewed the back together at the side seams, then inserted the zipper into that seam, and edge-stitched and top-stitched everything, only to discover that I was then trying to join the center backs to the front side seams. Those pesky notches showed me I was all wrong! I also recall Sandra Betzina saying that if you notice someone in a sewing class trying to put a sleeve into a neckline, gently suggest that they might prefer a cooking class. I often feel I should heed that advice myself.

Grrrr..... unpicking is now done, I will take this up tomorrow as I can't risk another stupid mistake today.

Saturday, September 3, 2011

Not Inactive, Just Quiet

I haven't been doing much sewing over the past couple of weeks. Lots of other things to do, plus hubby returned from working away, and good weather makes me want to be outside rather than inside sewing.

I did, however, finish a jacket that I made last year. I found it in the closet, with just the sleeve hems to be finished. This is McCalls 5396, an out-of-print pattern from Pati Palmer that is still available on her website at www.palmerpletsch.com

I particularly like back details on garments and this unlined jacket is gathered on the inside back waist with three rows of 1/4" elastic and then a belt is sewn over that on the outside. The jacket has a back yoke, another feature that I like, and I made this in a cotton/linen blend - which has to be my favourite fabric. It is lovely to sew, just like linen, but it doesn't crease like linen.
I think this qualifies as jacket #6, although I am no longer pushing to make 12 jackets before the end of 2011. A nice idea, but I haven't even worn the ones I have made so far, so it seems a bit frivolous at this point.


The plans for the grey/white linen blend changed from Simplicity 2938 to Burda 8511. I am sure this is also out-of-print, but since I can't seem to find my way around the Burda website, I am not going to try and find it here. You can see it (sort of) in the photo with the dress partially complete. I have lined the dress and will finish it soon. But I have to confess I lost interest as our weather has changed and the occasion to wear a sleeveless dress isn't presenting itself now. I shortened the dress to knee length and have lined it with rayon lining so that it will hang better. I find that even cotton dresses wear much better with a lining inserted and it eliminates the need to find a slip to wear.

I have another project lined up that I think I am going to really enjoy. It is Vogue 1247, the "Rachel skirt" - inspired by Carolyn's rendition. I have a medium weight blue denim that has just been through a hot water wash and dry twice and I will alter the pattern when I finish the grey dress. Must finish projects, must finish projects, must finish projects - even if I don't wear them right away.

I looked over the pattern instructions the other day when I bought it and was surprised to see that all the inside seams are bound with bias from lining fabric. I will use a soft cotton shirting rather than lining for the bias, and I will enjoy seeing the diagonal stripes whenever I put the skirt on. I also like the blouse in this pattern, although I think it would have to be snugged up closer to the neck for my use. You can wear something like this when you are 20-ish or 30-ish, but I think I would feel quite uncomfortable wearing something as floppy as this.


Sunday, August 14, 2011

Gore Skirt

I did make up a skirt from the linen blend fabric - it was just the right weight for a gore skirt. My favourite pattern - Kwik Sew 2956.
I doubt I will wear the top and skirt together unless I have a white sweater or jacket over top, it just seems too much print to my eye.
Instead, I will wear the skirt (today anyway) with this 100% linen blouse that I made last summer from Peggy Sagers Classic Blouse pattern. This is another favourite pattern of mine, so easy to construct with Peggy's factory methods for the facings and buttonhole placket.


I am now working on a linen dress from Simplicity 2938 and hope to finish it up later today.

Tuesday, August 9, 2011

Simplicity 2938 Top

Pardon the crummy pictures, but they are self-taken. But I was so thrilled with this pattern that I just had to post my success. After the last pattern failure, I thought long about this sleeveless pattern. I didn't want the poor fit that I just had with the green dress.


tClose up of the neckline, which has nice pleats

I remembered reading once that it is a good idea to cut out the facings and try them on before cutting the bodice. This is to check the neck fit. So I did that. And it occurred to me that I should try a smaller size at the neck and shoulders. Years ago, I read in a Nancy Zeiman book how to measure across your front chest from armhole to armhole and she had a chart that told you which size would fit you best. I measured a 14 according to this method. But I have been cutting size 16 in most patterns and then trying to get a better fit.

So I cut out size 14 facings, tried them on and saw that this would sit nicely on the neckline. So I went ahead and cut out size 14 in this pattern, i.e. size 14 at the neck and shoulder and then out to size 20 at the underarm to get the circumference required at the bust.

This turned out to be too large as well, and I took in the underarm seam down to the bust level, essentially cutting size 18 there. This can be taken in yet again, but this top is finished with binding on the armhole and I will pull it in with that. I have enough of this fabric, which is 50% cotton/50% linen, to make a skirt but that might be too much of this pattern. Still, who says I have to wear them together? A gored skirt in this fabric would be nice to wear.

When I cut out the dress, I will cut size 14 at the shoulders and neck, out to size 16 at the underarm and then to size 20 for bust and waist. It feels so good to know that I can cut this out with confidence, having tested this pattern first and been pleased with it.

This pattern calls for a 12" zipper in the left side seam; in the top, it is completely unnecessary as I can pull this on without undoing the zip. In a dress, however, it might be needed in order to get it over your head and over the shoulders. I guess it depends on how wide the hip area is. I think I could get away with no zipper.

h
This is the fabric for the dress in this pattern, a cotton/linen blend that has nice drape but enough substance not to be wimpy. I have rayon lining for it, but it may not require it.

Monday, August 8, 2011

Sometimes you just move on

well, this dress didn't work out for me. The fit is not good (sorry, no one here to take photos and I don't know how people take them themselves, I just get flash). The sides are easy to fit, but the neck area just doesn't look good.

I hand sewed the hem last night and have a lining cut out, but I think I will just give this dress away. Someone somewhere will have a brand new dress to wear, even if it is the colour of a frog, LOL! Perhaps I should have made the shirt as initially planned.

Things that don't work out always make us feel like failures. That is why it is good to at least finish the garment and give it away, much better than bunching it all up and trashing it. That is a real waste.

I remember a friend telling me that clothing manufacturers make many samples of a garment before it goes to production. They have a lot of time to get it "right". Work out the design, work out the sizing, work out the fabrics that work well. We only get one chance, unless we have oodles of the same fabric and are prepared to sew that pattern over and over until we are satisfied. Not me, time to move on.

I really want a dress. I rooted through some recent pattern purchases and found this one. Another Simplicity by the way. #2938 for an unlined dress. I doubt I would make that jacket, those flappy sleeves are just not me.


This dress has princess seaming in the front and some tucks in the center front neckline. I am thinking that I can resolve the neckline fit with those tucks. At least, I hope so! But I will make the top first just to check this out. Off to dig out some soft cotton for a trial run.

Saturday, August 6, 2011

Alterations a few but necessary

I decided to cut out the top part of this dress in some scrap fabric to re-check the fit having cut the pattern down one size. I left larger seam allowances on the shoulders so that I could take them in or out as required. That is an easy way to fix an armhole that is too low.
I'm glad I did this because right away I could see that I had the usual extra fabric at the top of the dress front. So I will move the pattern off the fold slightly when cutting out. Marcy Tilton gave this tip in her book on sewing knit tops and it works well and is so simple. It does add slightly to the bottom of the dress, but this is A-line so it doesn't matter.

Next I could see that I had to take in immediately below the armhole and I will use Carolyn's method of just sewing deeper seam allowances there, perhaps the top two inches. Not much is required since I had already pinched out a dart in the front armscye when I made this dress before.

But what I really noticed was that, if I sewed the facings on as is, the neckline and armhole would be cut in deeper and I was happy with them as they were, i.e with the seam allowances left on.

So I traced off the pattern again, this time drawing dotted lines on the center front and the underarm where I will make the small adjustments. And then I added 5/8" seam allowances to the armholes and the neckline. It was then easy to make new facings by simply tracing them off the new pattern.

The extra time to make that little fitting shell was probably half an hour, but I know that it will save me in the long run. After all, I would prefer a dress that fits nicely rather than one that is kind of sloppy in the upper neck area. Even though I will probably always wear this with a cardigan on top, I will feel better knowing that it fits well instead of settling for just a passable fit.

The cotton is cut out and I will iron the lining (which I had to run out and buy last night). I am going to line it with rayon lining to give the dress some substance. I have a couple of cotton dresses that I underlined with rayon lining and they feel wonderfully cool to wear, plus they have more body than just the single layer of cotton.

Check out Tany's blog and see how her lined cotton dress looks spectacular. Well, not that I am going to look like Tany but my dress can look as well made anyway.

Friday, August 5, 2011

Dress Complete - What's Next?

I finished up this dress this afternoon. I had the hems to machine sew, the buttonholes to make and buttons to sew on. I am glad that I chose classic shirt buttons, they seem right to me. That dark mark on the right is a water mark from the iron. I was in a rush to take the photo.

Next up is a simple shirt from this batik cotton that I bought from Vogue Fabrics. I don't usually wear green but this really appealed to me as so cheerful and I just want a very simple shirt to wear with beige capris.
The fabric will be a dream to sew, 100% cotton always is. And not boring, because of this bright colour.

I tend to sew boring clothes but this is what I wear most of the time. Sometimes I will wear something a little more exciting but I can't see spending oodles of time on things that only get worn once or twice a year. I would much rather fill up my closet with regular daywear than with special items.

Much of my day is spent back and forth to the swimming pool, grocery store, post office - just plain regular stuff. So the clothes are pretty regular too.

Update: I have been away from this for an hour and I thought "I don't want to make that shirt, I want to make a dress". As soon as I got home, I dug out this pattern, which I had previously made last fall, both the dress and the sweater/jacket.

I tried on the dress and saw that I can cut a smaller size, since I have lost about 12 pounds since I made it last. And I know I have some thick cotton jersey that will work for the jacket. Inspired by Carolyn's post on her "signature style", my mind is changed. That's our prerogative, right? As women, as sew-ers, we get to change our minds.

Now, I am really looking forward to cutting this out tonight.

Sunday, July 31, 2011

Progress on Shirtdress

Just goes to show when you put in a couple of hours straight, you can really get somewhere on a dress. I put on some music, settled in and really got places. Even with all the edge-stitching and top-stitching, this moved along quickly. I was going to quit when I reached the collar, but thought I would just keep going as I was thinking of the collar as a hurdle to overcome. Easier than I thought and quicker and I am happy with the results so far.

All that is left now is the sleeves, hems, buttons and buttonholes. I am thinking that this should have those classic shirt buttons that look like horn. I might even have enough of them in my button box.

This fabric is so soft and has a lovely drape, it feels like thick soft pyjama fabric. Makes me wonder why I left it stashed for so long.

Saturday, July 30, 2011

One Kwik Sew Finished, Another Begun

I finished up Kwik Sew 3050 last night, sewing on the 8 buttons while watching a movie. And during the week, I had gone through a box of fabrics, having energetically decided to sort my fabrics by colour. (will I ever be done?)

I came across the softest striped denim in a pale blue that I have been hanging onto for a couple of years. I had originally thought 'jean skirt' for this fabric, but Kwik Sew 3488 called out to me. So this fabric will become a shirt-dress. I actually have another length of it, so I can still make a jean skirt later if I wish. Hoping to lose a few more inches before making something with a definite waistline.

The dress is cut out now, and the interfacing has been applied. This pattern too looks like a quick-sew and I know I will really enjoy wearing this so-soft denim. This is probably my favourite type of project, working with denim and top-stitching forever.

Monday, July 25, 2011

Side Seam Pockets Method

Years ago, when I was dressmaking, a client brought me a RTW skirt to alter and I was intrigued by the pockets. They were side seam pockets but I could not see how they had been sewn into the seam. It wasn't until I found the method in a Kwik Sew pattern that I realised the pockets were sewn entirely to the front of the skirt. In most pattern instructions, you sew one pocket piece to the front, one to the back, then you sew them together when you sew the side seam and this means you must clip the back pocket seam allowance in order to turn the pocket to the front of the skirt.

This never made me happy as I really dislike clipping seam allowances. You never see this done in clothes that you buy; why should we do it in our own sewn garments?

With this method, one pocket piece is placed, right side down on the side of the skirt and you sew three sides of a square at 3/4" from the edge, as indicated on the pattern piece in the photo.


Then you trim out the fabric and clip into the corners, then turn the pocket bag to the inside and press. It is advisable to interface the edge of the pocket to provide stability for this pocket method.


Then place the second pocket piece, right sides together on the first piece, sew around the pocket bag and baste the top and side edges together. All that remains to do is to sew the side seams of the skirt, at 5/8" (which just skips past the pocket opening you made), making sure that you avoid catching the opening of the pocket in the seam. If you have done this well, the pocket is practically invisible until you insert your hand into it. Also, it rarely rips out with use as there is no strain placed on those clips that you didn't have to make!

The other beauty of this pocket method is that it doesn't gape. Have you ever noticed how those other side seam pockets pooch open and you can only see it from the back? not pretty, in my opinion. These pockets lie flat because they are all connected to the front which eliminates any possibility of gaping.

It is hard to see which piece is which, given this print, which is why I inserted the pocket pattern piece into the pocket to show where it is. The pocket really is as discreet as this photo, which is why I love this method. The more you do it, the closer you get the stitching of the pocket opening and the subsequent side seam, so that they are just a fraction apart.

Loes Hinse also uses this method on her Cruise Pants and she also top-stitches the edge of the pocket opening to reinforce it and keep it nice and flat, I suppose. But that is not really necessary.

Sunday, July 24, 2011

Summer Dress

The days are warm here, and I desperately need some cool dresses to wear. This is from Kwik Sew 3050, an out of print pattern. I wore a dress to aquacise the other morning and, when one of the ladies said "what a lovely dress", I thought why not make another one?

A quick trip to Fabricville netted a cotton print that was in colours I like, teal green and some burgundy accents. There is not much to choose from in this sewing-deprived town. And my stash didn't yield enough in a print for this pattern, plenty of solids, but I wanted a print.

This will be a very quick sew, as I know the pattern fits and it is pretty simple and straight-forward. I will put in the pockets, which are done the Kwik Sew way which is so much better than the other pattern companies' directions. I will take some photos as I make them, so that you can see the difference. This is also the method of Stretch and Sew, and I suspect that many of you are familiar with this method of sewing the pocket entirely to the front, then sewing the side seam in one continuous pass.


The pattern doesn't have sleeves and I added some from a Burda dress to this. I am not that comfortable in sleeveless tops as my arms are not toned enough. Hopefully, I will get this finished this week so that I can get some good wear from it in the next month or so while this warm weather lasts.

Monday, June 27, 2011

Two Dresses Complete


Pictures of the sundress for Elena and the dress for her daughter Hannah - these will be delivered in person next week when we pay them a visit in Ontario.

I was going to sew myself a pair of beige capris, but was at the mall this afternoon getting a gift for grandson Jacob and thought why not check out the Eddie Bauer store while I am here? And there were a pair of beige pants that fit - the new cropped style, although on me they are full length pants. I might shorten them 3" or just leave them as is.
With all the other things to do this week before leaving for a mini-vacation, I didn't need the extra pressure of having to make a pair of pants.

While out shopping, I ran into an old friend and her husband and we went for a cup of coffee and caught up on family news. It was great to see her, especially since the last time we talked she was facing a second round of cancer treatments. What a survivor!

Saturday, June 25, 2011

Dress for Hannah

There is something very satisfying about sewing children's clothes. They sew up quickly, fitting is minimal and the fabrics are just so adorable. Kids can wear things that we adults can't and how wonderful to sew such happy colours and prints for a little girl!


The pattern is Burda 9545, version A. This version features a neck facing that is done in reverse, i.e. sewn to the inside and flipped out and edge-stitched in place. This is actually a nice technique for finishing women's blouses and gives an opportunity for some kind of embellishment at the neckline.
The skirt is doubled, with one layer longer than the other. The underlayer will be sewn in the coral cotton with the top skirt in the printed seersucker. So cute!

And I will be delivering this in person to Hannah, as my husband is heading off to Ontario for some work and I am able to go with him for the time. We will be paying a short visit to Elena's family, where we will have a family reunion. All three daughters, Rebecca from Texas, Elena, and Martha (aka Sister Ilaria of the Franciscans of Halifax) will be spending a week together, the first time all three have been together since Elena got married in June 2002.

Elena and Dave will play host to four adults and seven children under the age of eight for a week (plus mom and dad for a day) - good thing the house is spacious and the yard is big too! Here's hoping for some great warm weather, anything must be better than the miserable cold wet weather we have been getting in Halifax for the past two months.

Sunday, June 19, 2011

Advice wanted

Being the old hippie that I am, this skirt caught my attention and now I just want to re-create it. But I am puzzled. Obviously the skirt is made up of two or three prints, but I am wondering how best to make it.

I can see that the pieces are squares sewn together, much like a quilt. But there appears to be some bias going on. Would it be best to make the fabric first and then cut out a skirt? Or would it be better to piece the fabrics into skirt panels, then construct a bias skirt and cover the seams with binding as shown?

This pattern comes to mind - Kwik Sew 3108, the one on the far right.

Although the pieces are narrower, I could see making up these in a couple of fabrics, then trimming the seams with another print. Or is this just too much work and would the resulting skirt be too heavy?

When I look at the original photo, I see a soft skirt that has been washed a hundred times and feels like a second skin. Perhaps I am just being nostaglic?

I currently have a purple sweater on the go and I can see soft purple print cottons for a skirt.